
I have a business trip coming up that requires LOTS of walking. I have learned from past experience that when I am on my feet for that many hours, I don't want to be carrying a purse, or anything on my shoulders and back, because they end up very sore, very quickly.
I do, however, need something to carry money, I.D., business cards, phone, etc., and I had something in mind, but couldn't find it anywhere in stores, so I made my own and I am going to show you how to do the same! This is my very own Purse-to-Hip Purse tutorial.
*I apologize for the poor picture quality - I had to improvise with my cell phone today.
I started out with a small (about 6.5" x 5") cross-body bag. I found this at a major big box store retailing for about $16.99.
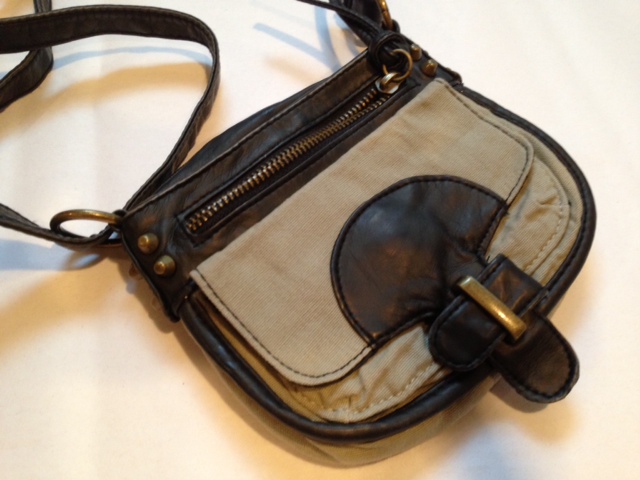
I took a pair of scissors and cut the straps, and the hardware holding the straps, off.

These straps are nice and wide - perfect for re-purposing into belt loops. Simply cut 2 pieces, each about 5" long. You won't need all 5", however it is much easier to have excess to work with, rather than not enough.

Next, you will sew the top of the strap to the back of the purse toward the top. I visually divided the width into thirds and placed each strap at my imaginary dividing line. You don't want them too close together, or the purse will tip to one side when it is on your belt. You also don't want them too far apart, or - I don't know what:)
I have a vintage sewing machine made with all metal gears, which lets me sew through multiple layers with ease. I was able to use this to sew the top portion of the straps down. If you don't have such a machine, you will need to hand sew the straps to the bag, as a modern plastic machine won't be able to handle the thick layers of leather.

Next, I needed to hand sew the bottom portion of the belt loops because the purse was too tight of a squeeze for my machine. To hand sew, I chose to use a heavy-duty Button & Carpet thread to ensure the belt loops stay on tight. I also used a very thick needle that could handle sewing through canvas and leather layers.

I used the belt loops on my pants as a general guide for the size of these belt loops. I didn't worry about the neatness of the stitching here because no one will see it, and let's be honest, it was brutal trying to sew through the leather!
You can see on the right hand side, I still have excess strapping tucked underneath. I simply took a pair of scissors when I was done sewing and snipped it off, leaving about 1/4".
You can see on the right hand side, I still have excess strapping tucked underneath. I simply took a pair of scissors when I was done sewing and snipped it off, leaving about 1/4".

Here is the finished Hip Purse. So much better than a fashion-challenged fanny pack!

And here is one more....
This is a cute little aqua wristlet I found at the same big box store. It doesn't have a strap I can re-purpose, so I had to improvise with ribbon.

I followed the exact same steps as shown with the first bag above, except I used this cute panda woven ribbon for the belt loops.

Finally, the little wrist strap was easily removed from it's latch hook and voila! My new aqua-slightly-retro Hip Purse.


Genius! I love both of them.
ReplyDeleteThis guide is really helpful and detailed.
ReplyDelete