Showing posts with label quilting. Show all posts

Friday, November 30, 2012

Fast Quilt Tutorial,Confession, and Giveaway!

Hello, there! Today we’re going to learn how to make the FAST! Centered Strips Quilt Top...then I’ll confess something...then we’ll have a giveaway.


Materials Needed:

  • Twenty-one 2.5” strips of fabric
  • Two pieces of coordinating fabric that measure approx. 13” x 60”. It’s best to wait to cut them until you are ready to sew them on. Then you can do exact measurements.
  • 3.5 yards jumbo ric rac
  • Coordinating thread

About this Quilt:

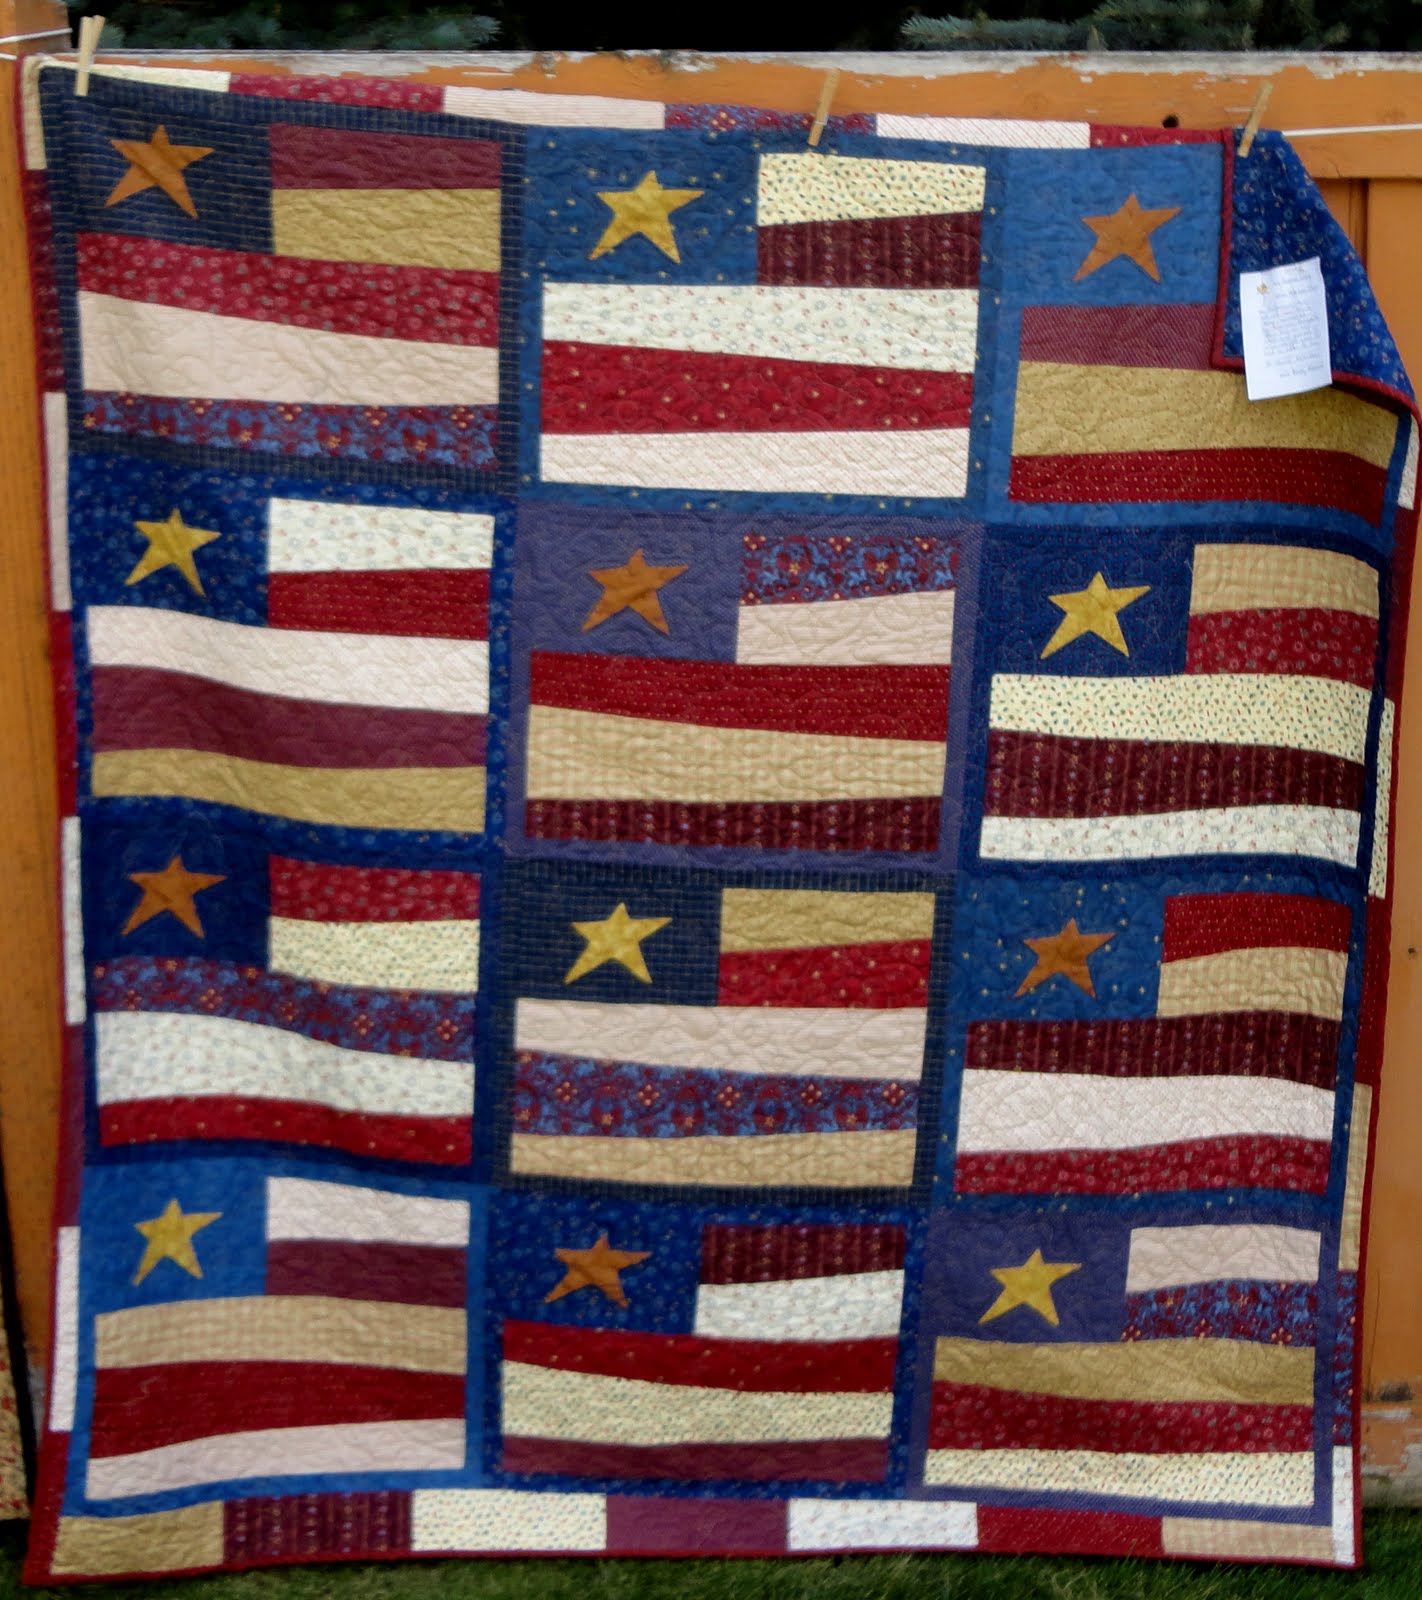
The inspiration for the center portion of this quilt is from the Heirloom Creations Jelly Roll 1600 quilt.

[photo courtesy of heirloomcreations.net] - Two Jelly Roll 1600 Quilts using the same jelly roll
They use 40 strips and end up with a full quilt top. However, our tutorial only uses 21 strips and ends up with a narrower piece. Then we add the two side pieces and the ric rac, and there you have it! 

Instructions:

Heirloom Creations provides instructions and a video to explain their technique. I highly recommend reading/viewing those first, before doing Steps 1, 2, 3.
Use ¼ inch seams.
STEP 1: Sew the strips together diagonally (like you do with binding) to get one really long strip. 

STEP 2: Cut off 18” of the really long strip and discard it. 
STEP 3: Take one end of the strip, line it up with the other end of the strip, and sew a seam along the entire long side. You will end up with a strip that is 1/2 as long as the original strip. The two are still attached at the bottom, so you’ll need to cut them apart. Now line up the top end with the bottom end, and sew along the entire long side. Repeat these steps until you have a piece that is approximately 26” x 60”. This is your quilt center piece. Press the seams open.

STEP 4: Side pieces. The width of each side piece is 13”. Measure the length of the quilt center piece, and cut the two side pieces to fit. You may want to leave an extra inch or two and trim it after sewing. Sew the two side pieces to the center piece.

STEP 5: Sew the ric rac on.
Your FAST! Centered Strips Quilt Top is done.

Now for the confession...

I set out to make the full Jelly Roll 1600 quilt. I didn't read the instructions carefully, so I didn't realize I needed 40 strips. The Rolie Polie (Riley Blake's version of the Jelly Roll) I used only had 21 strips, and it was too late before I discovered my error. After frantic phone calls with a couple quilter friends – THANKS LADIES! – I worked out a solution. So this really should be called the "Sara Doesn't Read Instructions Carefully Quilt."

Now for the giveaway… (the giveaway is closed)

I am giving away this beautiful Rolie Polie from Riley Blake’s Pieces of Hope fabric collection. It is the same one I used to make the center portion of this quilt.
    There are three ways to enter, which means each person can enter at most three times.
    • Leave a comment. Just say hi...or tell us about a quilting mess-up you have experienced. I’m sure I’m not the only one, right?!?
    • Visit Arcadia Cotton, then leave a comment back here telling us one thing you LOVE.
    • Visit Flannel Queen, then leave a comment back here telling us one thing you LOVE.
    Shipping: You must have a US or Canadian address to enter.

    Deadline: This giveaway ends Monday night at midnight (Dec 3). The lucky winner will be announced on Tuesday morning! Good Luck!


    Friday, November 2, 2012

    Calculating Fabric Requirements for a Rag Quilt

    "How much fabric do I need to make a rag quilt?" 
    I get asked that question a lot, so here's your answer!

    You will need the following information:
    1.    What size of squares are you going to cut?
    2.    How many different fabrics are you going to use?
    3.    How large do you want the quilt to be?
    4.    How wide is your fabric?

    For our example, here are our answers:
    1.  What size of squares are you going to cut? 6-inch 
          (This is a pretty standard size. If you use bigger squares, the project will be easier 
          and go faster.)
    2.  
    How many different fabrics are you going to use? three fabrics
    3.  
    How large do you want the quilt to be? 35” x 40”
    4.  How wide is your fabric? 43”


    Now for the calculation!

    Step 1: How many squares will you need?
    Due to seam allowances, the finished quilt will have squares that are one inch smaller than what you cut. For example, since we are cutting 6-inch squares, the finished quilt will show 5-inch squares. The additional one inch is in the fringe.
    Our finished quilt is 35” x 40”. That means it will have 7 squares in each row, and it will have 8 rows.
    Figuring out the number of squares needed for your quilt.
    There are 56 squares total (7*8=56). However, we also need the same number of squares for the back of the quilt. So our total number of squares is 56*2=112.
    (Note: if you are using batting as the middle layer in your quilt, you will need to cut 56 squares of batting. Make them 5" squares so they won't show in the fringe.)

    Step 2: How many squares of each print will you need?
    Draw a picture of your quilt and label where you will use each fabric. I chose a very simple design for this example, but you be as creative as you want. Then count up the number of squares for each print. Don’t forget to multiply by 2 for the back of the quilt.
    Calculating the number of squares needed for each fabric used.
     Step 3: How much fabric will you need?
    Now you need to figure out how many squares you can get out of the width of your fabric.
    Our fabric is 43” wide, and we are cutting 6” squares. That means we can cut 7 squares out of the width of fabric.
    In other words, for every 6” cut of our fabric, we can get 7 squares. 
    We need 38 squares of each print, so we need seven 6” strips of each of our fabrics. That is 42” of each of the three fabrics.

    There you have it!

    Do you have additional rag quilt questions? Leave a comment!

    Friday, July 20, 2012

    I Spy Ombre Dots!

    Can you tell I love these fabrics?  Riley Blake Designs Chevron and Ombre fabrics are the hottest things to hit the market and we're starting to see them all over Pinterest and the Blogosphere!  Here are some of our most recent sightings:

    Studio 5 recently did a great television segment featuring the Ombre Dots.
    I have got to make that ruffle pillow!
    http://studio5.ksl.com/?nid=59&sid=21293879

    True Up and The Fabric Shopper posted these great pictures from Quilt Market.
     

    Pine Needles at Gardner Village posted this adorable pillowcase dress.

    And finally, IHeart Organization is having an Ombre Dot and Chevron giveaway!

    Monday, February 27, 2012

    Sarah Jane - Children at Play Quilt Tutorial


    Sarah Jane is a children's book illustrator who recently designed the "Children at Play" fabric collection for Michael Miller. I absolutely love these fabrics. I love the whimsical innocence. Hopscotch, paper airplanes, bicycles, pinwheels... they are adorable.

    You can find the Children at Play cottons at The Dizzy Daizy, and you can find the flannels at Flannel Queen.


    Sarah recently shared a tutorial for this paper airplane quilt on Michael Miller's blog.  She also has a Flickr Group you can visit to see creations using her fabrics. Have you seen the little girl's dress that uses the border print? Oh my goodness, it's way too cute. So inspiring!!!

    Thursday, September 15, 2011

    Garden Quilt Show, Part 2

    More pictures from the Garden Quilt Show! If you missed Part One, go here.

    This quilt's bright colors kept catching my eye.


    A fun way to hang the stockings.

    Notice the rough edges. So neat!

    Quilts from "Bee in My Bonnet"

    How cute is this quilt?

    I love all of the details.


    Aren't these quilts inspiring?

    It's a Garden Quilt Show!

    The Dog Kennel Quilt Guild in Highland, Utah does a garden quilt show each year to display what they have been working on. Every available surface is covered with amazing quilts. Take a look...
    Quilts lined the fence...
    Quilts hung around the trampoline enclosure...
    A bed was brought out to showcase a quilt...
    Quilts were everywhere!
    I love this quirky Christmas Tree quilt.

    This purse quilt is absolutely amazing.

    Each purse in the quilt has buttons and other details.

    Another one I love.

    Someday I want to make this American Flag quilt.

    This quilt was very sweet. I love the scalloped edge.

    Can you believe this quilt?!?

    I had to get a close-up of a circle. Simply amazing.
    This cherry quilt is so cute. Look at the neat border.
    Beautiful colors in this quilt.
    I also love the ric rac.
    This heart quilt is pretty from far away...
    ...and even more beautiful up close. Each heart has unique details.


    I have more pictures to share. Stay tuned!